Customize the Classic calendar email view
You can customize the email messages sent from each of your calendars, per your organization's needs and requirements.
In this topic:
Set preferences for the Classic view
This task assumes that you have the Classic calendar email view selected. For more information, see Select a different calendar email view.
- Go to the Publishing Control Panel page, and then open the Email tab.
- In the Calendar Email section, at the bottom of the Classic box, click Edit Settings & Styles.
- On the Edit Settings for Classic page, on the Settings tab:
- (Optional) Email header and Email footer; Add a custom email header (banner) and/or email footer (privacy/unsubscribe options). See: Custom email headers and footers.
Note If you leave the Email footer field empty, 25Live provides a default footer with the option to unsubscribe (opt out) and report email abuse (spam). If you add anything to the field, it replaces the default message. You must still include the unsubscribe (opt out) link.
- Include legend on the right and Include legend below events; To include, in the email, a calendar color legend below and/or to the right of the events, select Yes for the preferred location(s).
You must also enable calendar colors. For more information, go to How event colors work.
Note Calendar colors are relevant only if you mix other calendars into the calendar you're publishing, as in the image below. (Otherwise, the calendar color legend doesn't appear.) The calendar colors in the legend correspond to the calendar colors in the 25Live editing environment.
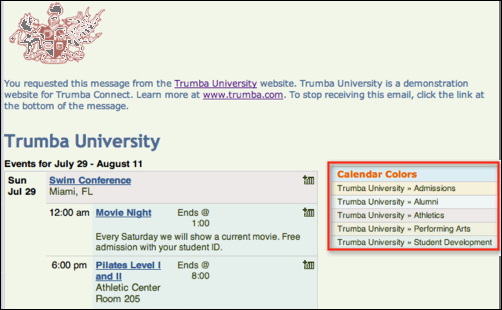
In this calendar email message, the calendar color legend is outlined in red.
Tip For best results when the calendar emails are viewed on mobile devices, leave the default settings—the color legend below events—in place.
- Include upcoming events; To add an additional set of upcoming events in a list at the bottom of the email, select Yes.
For example, if you set up your calendar email to include the next two weeks' events, the additional list includes another two weeks' worth in a more compact format.
- Include indicators; To add indicators that highlight new and updated events, select Yes.
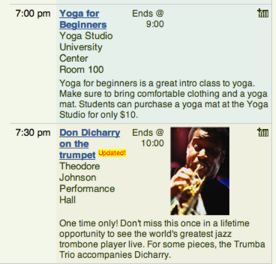
An updated indicator on an event in a calendar email message.
- Include new/updated event list; To add a table of new and updated events to the top or right of the main event list, select Yes.
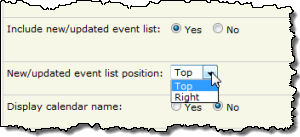
By default, the new/updated events list is set to display at the top, above the main event list. This works best on mobile devices with small screens.
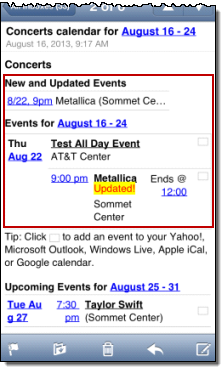
If you prefer, you can set the new/updated events list to display on the right (as shown below).
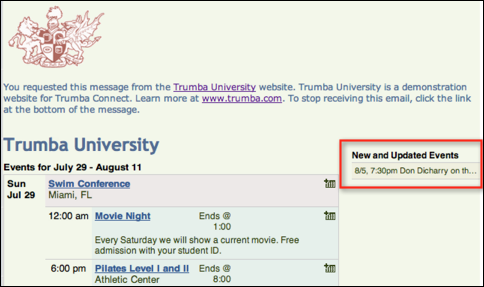
In this calendar email message, the New/Updated event list (outlined in red) is set to display on the right.
Note If there are a large number of new/updated events, the size of the table can overwhelm the email layout. By default, it's not included.
- Display calendar name; To show the owning calendar name below the title of each event, select Yes.
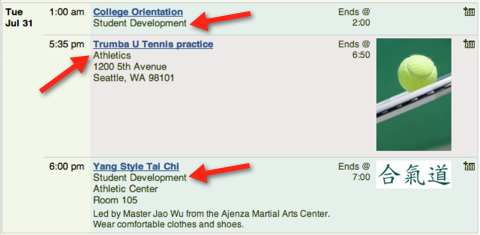
Red arrows point to the names of each event's owning calendar.
- Title character limit, Location character limit, and Description character limit; Set the character limits, as appropriate.
- Image Settings; If you have added images to your calendar's events, you can include the images in calendar emails.
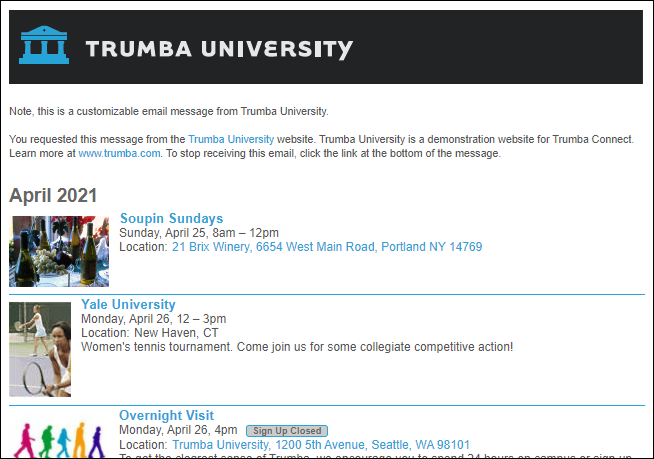
Images in calendar email events.
To include images, for Image position, select Left or Right.
To change the maximum dimensions for the images, type the new value(s). While maximum width is often the more important parameter to set, if some of your images are tall and skinny, you may want to set a maximum height as well.
- (Optional) Email header and Email footer; Add a custom email header (banner) and/or email footer (privacy/unsubscribe options). See: Custom email headers and footers.
- At the bottom of the Settings form, click Preview to preview your changes to the settings.
- When you're satisfied with the settings, click OK.
Set styles for the Classic view
You control the appearance of the calendar section of the email (e.g. darker blue in the screenshot below) in one location and the event section (e.g. lighter blue in the screenshot) in another location:
- To set styles for the event section of the email (lighter blue), you use the Classic calendar email view style sheet. See: Set styles for the event section of your calendar email, just below.
- The calendar section of the email (darker blue) brings in its styles (e.g. event background, text, and link colors) from the Customize Your Calendar Colors form in 25Live. See: How event colors work.
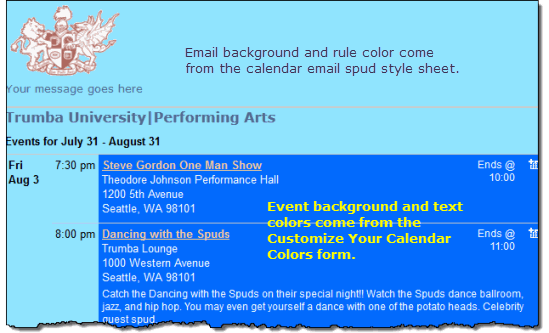
Set styles for the event section of your calendar email
- Go to the Publishing Control Panel page, and then open the Email tab.
- In the Calendar Email section, at the bottom of the Classic box, click Edit Settings & Styles.
- On the Edit Settings for Classic page, click the Styles tab.
Tips
- If you set base styles, many of your custom base settings will be reflected on the Styles tab. You can modify any of these settings if something different works better for email messages.
- If your base styles include a custom font, you see the custom font listed in font fields on the Styles tab. However, custom font code does not affect emails so the email font defaults to the next font listed.

The message title will be in Helvetica (rather than the custom Nunito font) unless you edit the field and specify another standard font.
- In the Body section, type the hexadecimal value for the email message background color.
- In the Message section, set the styles for the title and body of the email.
Note Body styles apply only if you have a custom message setup on the email. See: Send events by calendar email.
- In the Rules section, type the hexadecimal values for the top and bottom rule colors and a pixel value for how thick you want the rules to be.
Note Rules styles apply only if you have a custom message setup on the email. See: Send events by calendar email.
- At the bottom of the form, click Preview to see how well your style settings work.
- When you're satisfied with the settings, click OK.
- To set the event background, text, and link colors, in the Publishing Control Panel, click the Publish Settings tab, and then click Edit Calendar Colors.

- In the Customize Your Calendar Colors form, provide hexadecimal color values for the event background, fade, text, and link colors.
- Click OK.
