Manage calendar views while editing
When you're working in the editing environment, there are several ways to organize and view your calendars and events to optimize your work.
Tip This topic is about working with calendar views when you're adding and editing events. If you're looking for information about choosing views for your live calendars, see Main calendar views. If you want to know how visitors to your live calendars can switch between views, see View Chooser spuds.
Topic links
- Change the current calendar view
- Navigate the mini calendar
- Extend the number of hours displayed in Day views
Can I view events on more than one calendar at a time?
Change the current calendar view
You can change how events appear in the current calendar by choosing a different view from the menu (above the calendar), selecting a variable range of dates or weeks in the mini calendar, or by applying a filter to the events shown in the calendar view.
Choose a different view from the menu
Select one of the views:
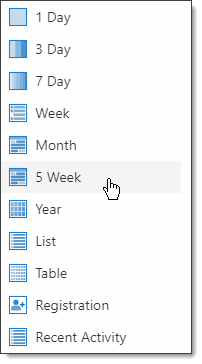
- All views (other than Year) include the date, time, title, and location of the events.
- Month, 5 Week, Year, List, Table, and Registration views include drop-down arrows that you can click to display a menu of common event commands.
You can hover over the events in the other views to show the drop-down arrows.
- Week, List, Table, and Registration views also include event descriptions.
Adjust the calendar view by a variable range of dates or weeks
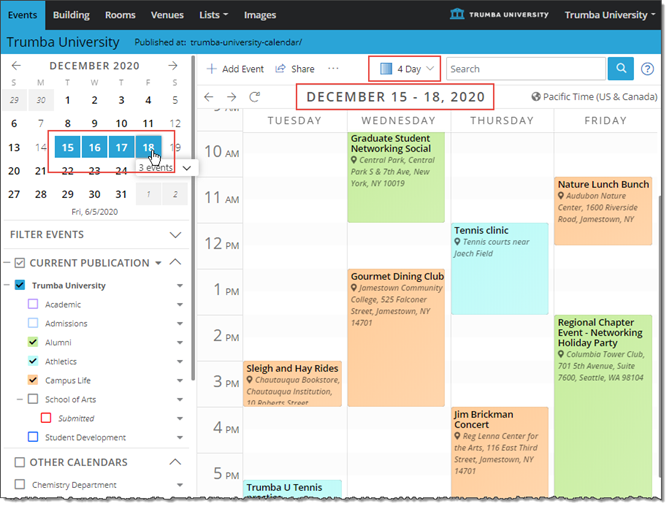
While only the 1 Day, 3 Day, and 7 Day views appear in the calendar view drop-down list (see the image above), you can also click and drag your mouse cursor over a variable range of dates in the mini calendar to instantly adjust the calendar view to two, three, four, or six days as well.
Here, for example, we've selected four days in the mini calendar, which you can see in the menu and in the dates in the calendar view:
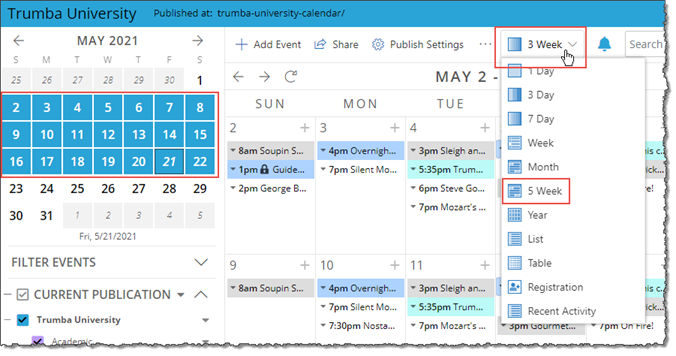
Similarly, while only the 5 Week view appears in the calendar view drop-down list (see the image below), you can also click and drag your mouse cursor over a variable range of weeks in the mini calendar to instantly adjust the calendar view to two, three, or four weeks as well.
Here, for example, we've selected three weeks in the mini calendar, which you can see reflected in the menu and in the weeks included in the calendar view:
Filter the events shown in the calendar view
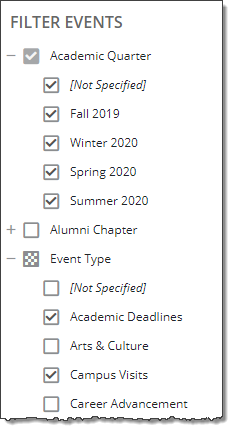
To filter the events shown in the calendar view, open the Filter Events section under the mini calendar in the 25Live editing environment.
You can apply filters based on the custom fields/values you've specified, such as in this example:
Notes:
- Blank check boxes: the filter is not set, nor are any of its child filters.
- Checkered check boxes: one or more of its child filters are set.
- Checked check boxes: the filter is set, including for all of its child filters.
- [Not Specified]: the field is not set to any value in the events.
Work with advanced calendar views
25Live provides two specialized calendar views that display a broad overview of your events and event data, at a glance.
Table
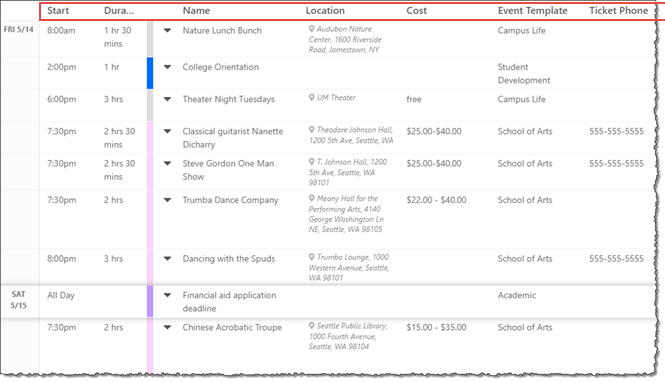
The Table view lays out the events in your selected calendars in table format, including separate columns for each of the custom fields you've defined across the templates associated with the events.
Note Multi-line text fields (such as for the event description) are not included as columns in the Table view, to preserve the layout of the events.
With this view, you can review the detailed event data for multiple events at once, without having to open each event individually. You can click the title of the individual events to open the add/edit event form, and then apply any changes.
Tip You can filter the events shown, as appropriate, to just the set of events you want to review. Using the Event Template filter along with this view, for example, can be very useful in that you can limit the columns shown in the table to just those custom fields that are defined in the templates you select in the filter.
Here's an example Table view, with the first seven columns highlighted:
Registration
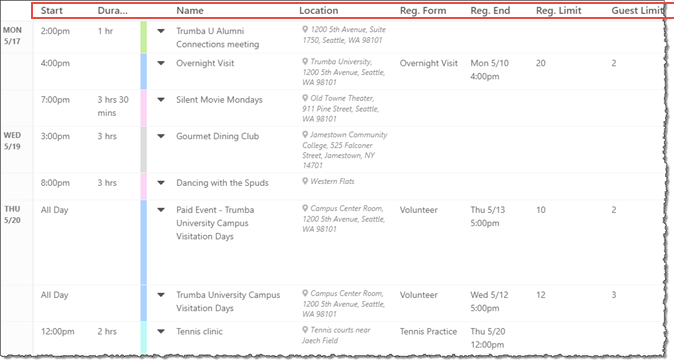
The Registration view lays out the events in your selected calendars in table format, with separate columns displaying most of the registration data for the events. (Non-registration events appear as well, with blank values in the columns.)
You can review the registration settings and counts (registration and wait list) for multiple events at once, without having to open each event individually. From this view, you can click the title of the individual events to open the add/edit event form, where you can apply any changes to the registration settings.
Note From the Registration and other calendar views, you can quickly see the registration and wait list counts by clicking on the registration indicator icon (left of the event title).
Here's an example Registration view, with the first ten columns highlighted:
Navigate the mini calendar
You can change the dates displayed in the active calendar by using the paging buttons at the top-left of the calendar.

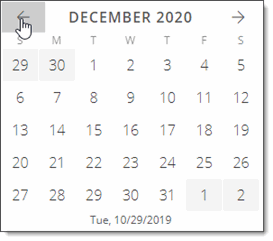
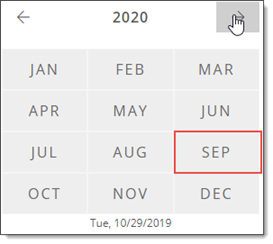
You can also change the dates shown using the navigation controls in the mini calendar:
- Click the next or previous month controls:
- Or, click the month and year at the top to switch the mini calendar to a yearly view, and then navigate through the years (or a particular month in that year):
Tip To return to today's date, click the date at the bottom of the mini calendar.
Extend the number of hours displayed in day views
When you display your calendar in any of the day views (for example, 1 Day, 3 Day, or 7 Day), you can change the calendar settings to specify the start and end times that appear for each day. By default, the start time is 7:00am and the end time is 10:00pm.
Note In the add/edit event form, you can schedule events during hours that don't currently appear in the day views. When you save the event, the hours appear on the calendar for that day (or days).
